Your basket is currently empty!
Bonus Tips for Running Tracks Using the Prime MultiTrack App
If you’ve had a look at the Prime MultiTrack app from Loop Community, you’ll notice that there’s a ton of functionality. The aim of this post is to take a look at these features and how to use them on stage. We must state, however, that some functionality is limited only to paid users. That being said though, there’s a lot that can be done, even with a free account. So let’s begin
Transport Controls
At the top left you’ll find your basic transport controls

Master audio meter
Shows you the master output level
Previous track
Skips to the previous track (not quantised).
Play/Pause
This will start and stop playback, note the playhead will remain at its current position when paused.
Stop
This will stop playback and reset the playhead to the start of the track.
Next track
Skips to the next track (not quantised)
Loop
This will loop the current section you’re on and works in 2 ways. If pressed once the section will loop once and then continue as normal. A second press will trigger an infinite loop that will continue to loop unless prompted to stop.

Fade In/Out
This will fade out all stems but will keep the click and cues going. This is helpful in cases where the band gets off track, and once you’re back on track you can fade the stems back in.
Time, Tempo & Key
At the top right corner, there are some more controls. They’re pretty self explanatory but there are some additional options when they are clicked on.

Time elapsed/Total time
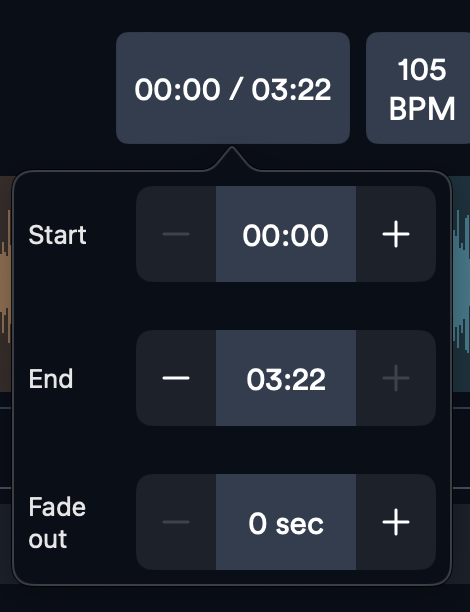
Clicking on this will bring up the options to adjust the start time, the end time and when a fade out should begin.
BPM (or Tempo)
Clicking on this will give you the ability to increase or decrease the tempo in one beat per minute increments. Alternatively, you can tap the desired tempo by using the ‘TAP TEMPO’ button underneath.

Key
Displays the current key and clicking gives the option to change the key. (Note: you can adjust the key up or down a semitone or 2 but after that the audio quality becomes noticeably lower in quality. It may be worth exporting from your DAW in the desired key.)


MIDI In
This allows you to assign notes from your MIDI controller to functions in the Prime App. After clicking on the MIDI In button, the interface will change to make functions assignable. Click on the function you want to control, then press the button on your MIDI controller to assign that button to the function in Prime. (Note: some functions are only available on a paid plan)

Settings
General Tab
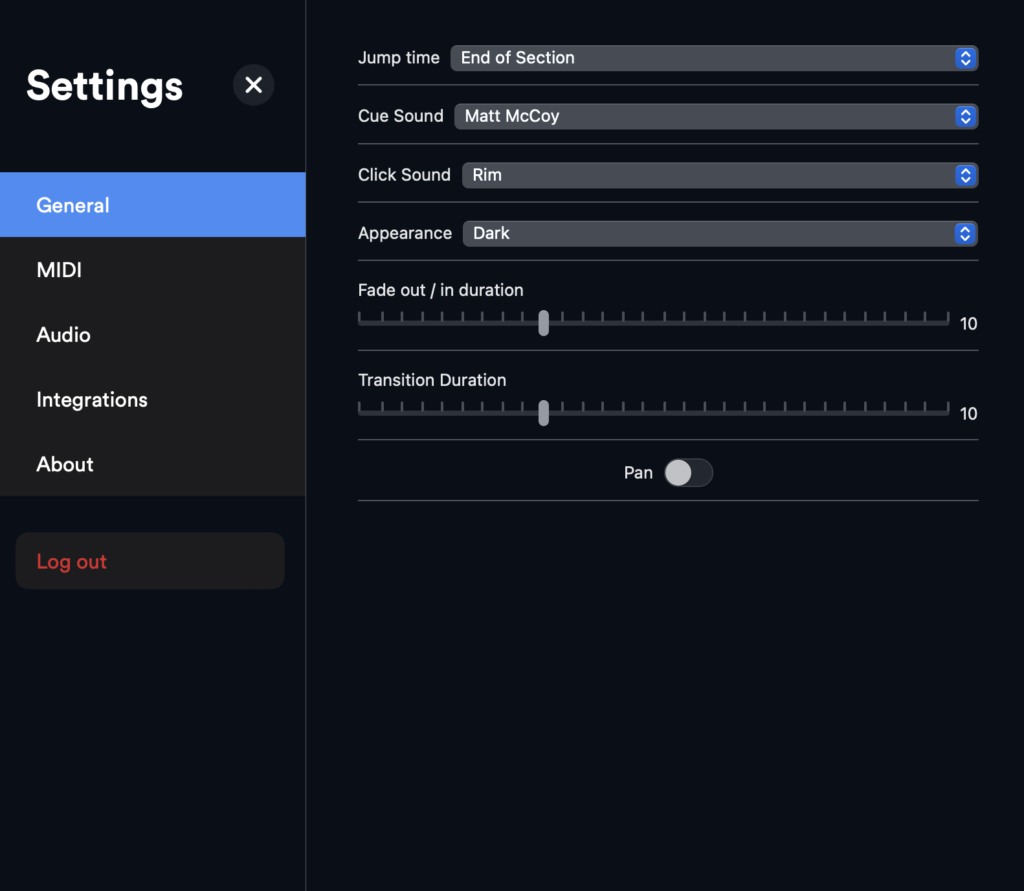
- Jump Time – you have the flexibility to jump around your song on stage if you need to and, thankfully, it’s quantised (meaning it’ll keep things in time). There are 2 settings for this 1, it’ll wait until the current section ends before going to the desired section or 2, it’ll wait until the next down beat and then jump.
- Cue Sound – change the voice of the cues.
- Click Sound – change the sound of the click.
- Appearance – choose the theme of the app (light, dark or system preference)
- Fade out / in duration
- Transition Duration
MIDI Tab
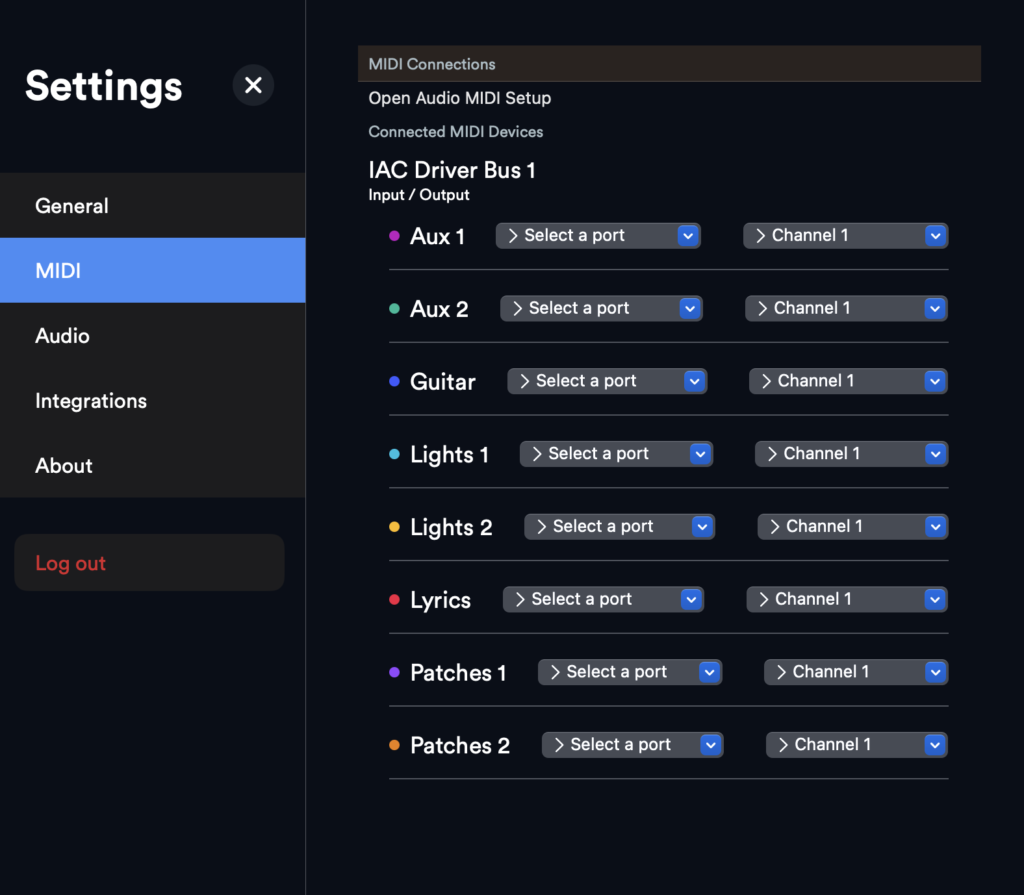
This function is only available to members on a paid plan.
Audio Tab
The drop down menu allows you to select an audio device. Any devices that are plugged in will appear here. (All tracks are categorised into ‘track types’ so all it will affect all tracks in each track type. You can make tracks Mono or Stereo and select what channel it goes to. This function is also only available to members on a paid plan).
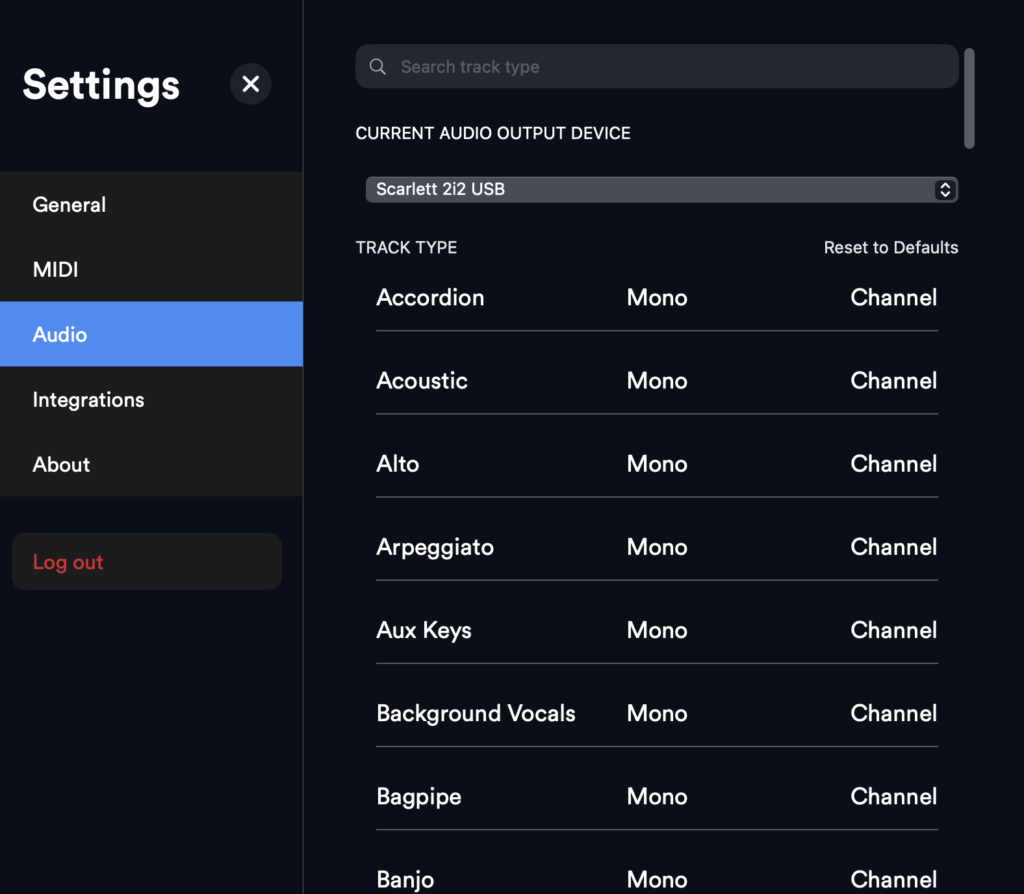
Integrations, About & Log Out Tabs
Integrations use other apps that work with the Prime App. About is just a few bits of info and log out signs you out of the app.
Timeline
Timeline
The display of your entire song from top to bottom (separated by arrangement markers)

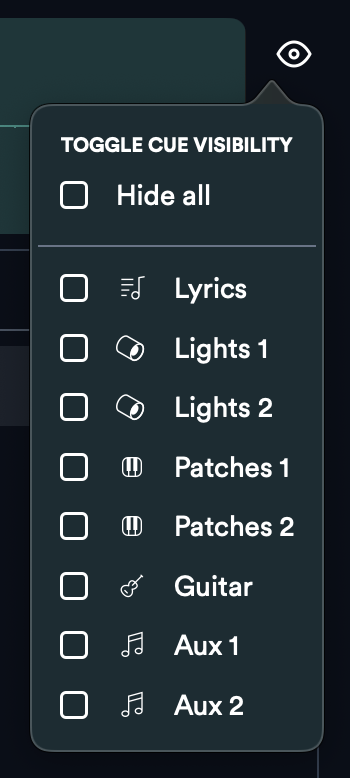
Toggle Cue Visibility
This feature is only available to paid users
Edit Arrangement
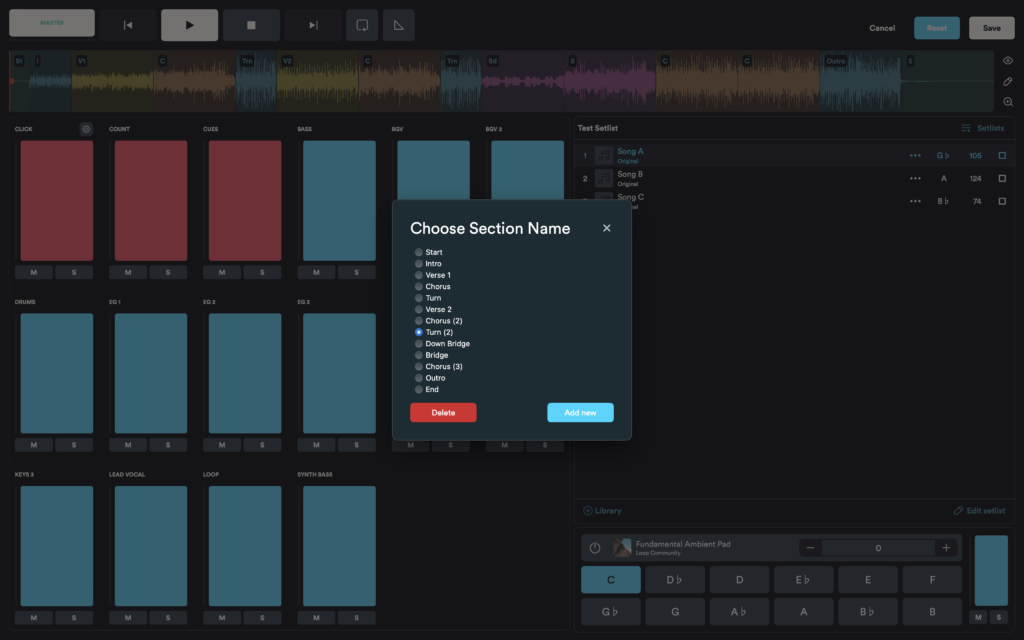
You can edit the arrangement of your song sections if you’ve assigned markers. This is accomplished by tapping the pencil to the right of the timeline, then ‘edit arrangement’.
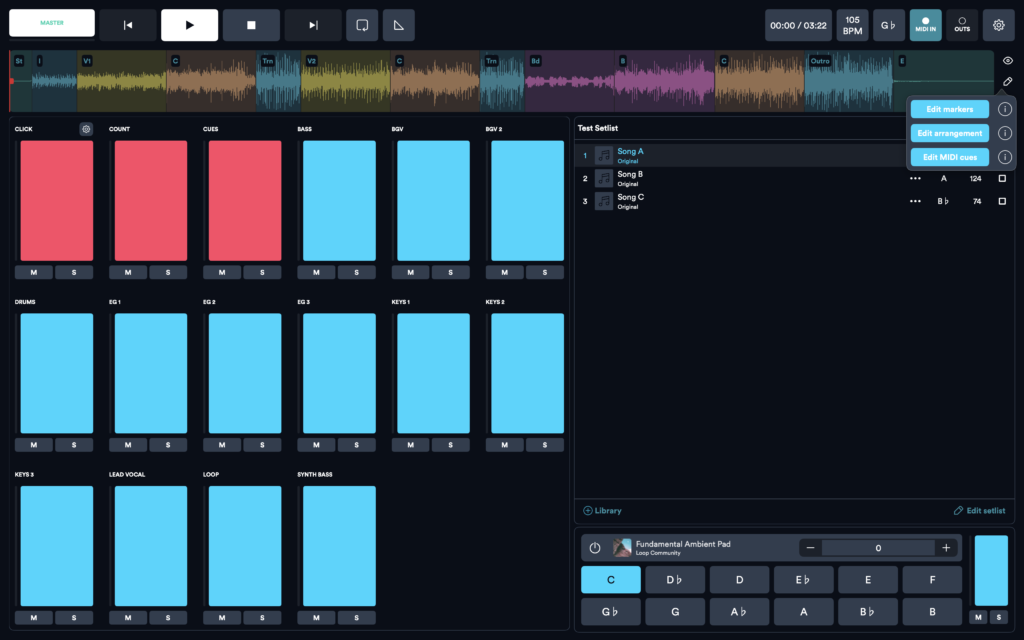
For this example, we’ll add a section and remove a section. We’ll double up the last chorus. Double click on the chorus, then select Chorus (3), the last chorus, and then click ‘add new’.
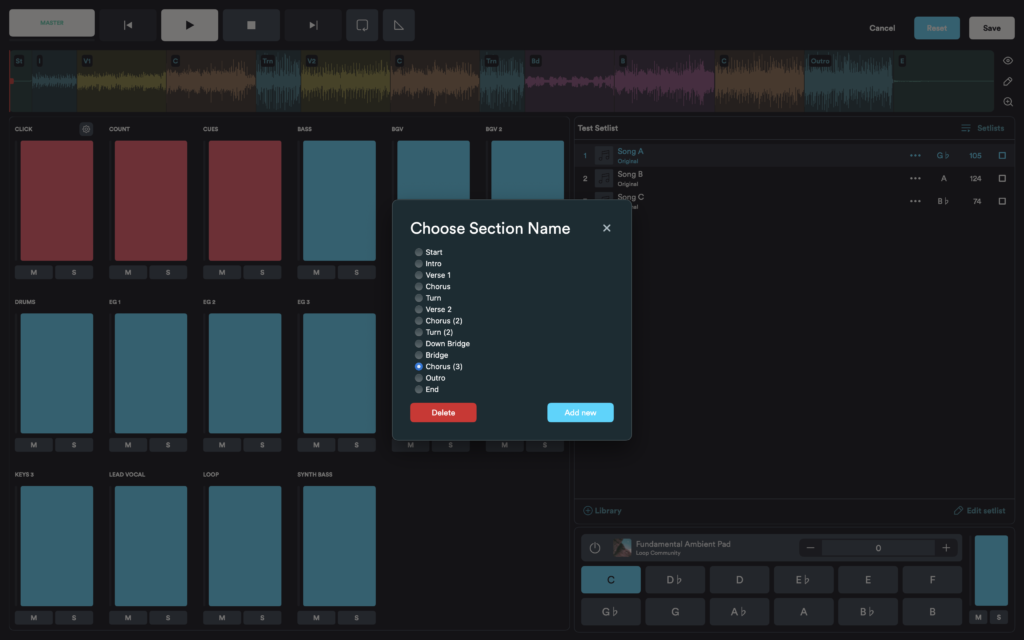
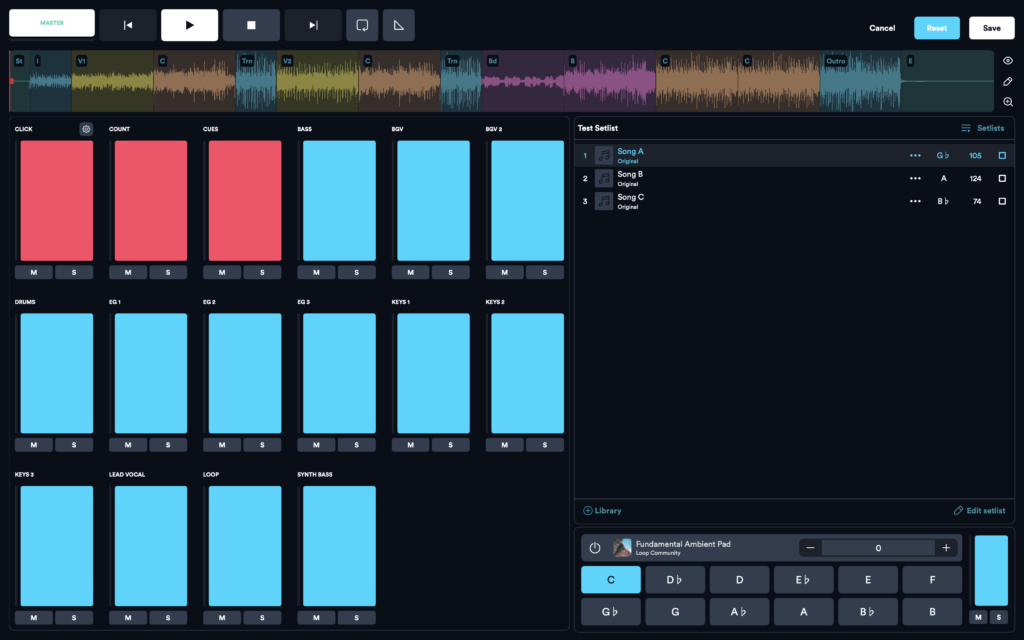
Now, let’s delete a section. Double click on it and then press ‘delete’. If you’re at all unhappy with the new arrangement you can reset it to the original. If you’re happy, press ‘save’.

Zoom
Zooms into the timeline (Has 3 settings; full timeline, x5 zoom, x10 zoom)
Audio Channels
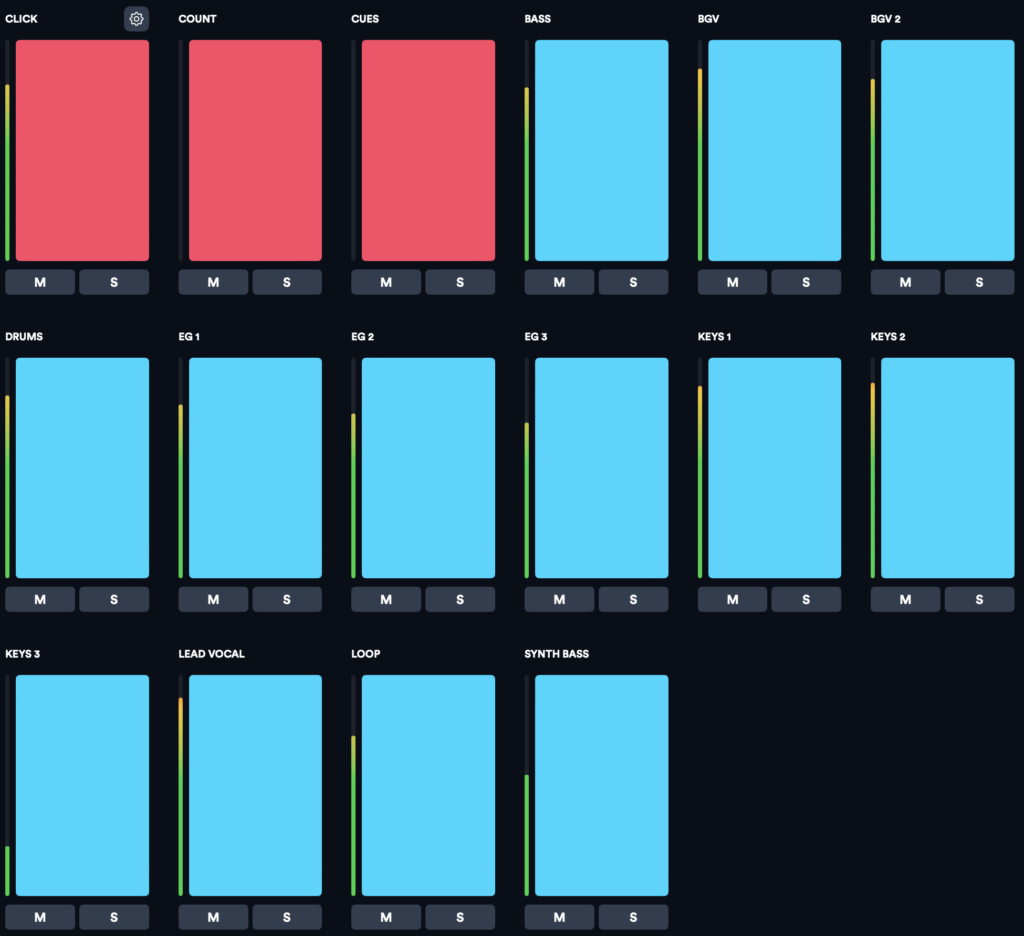
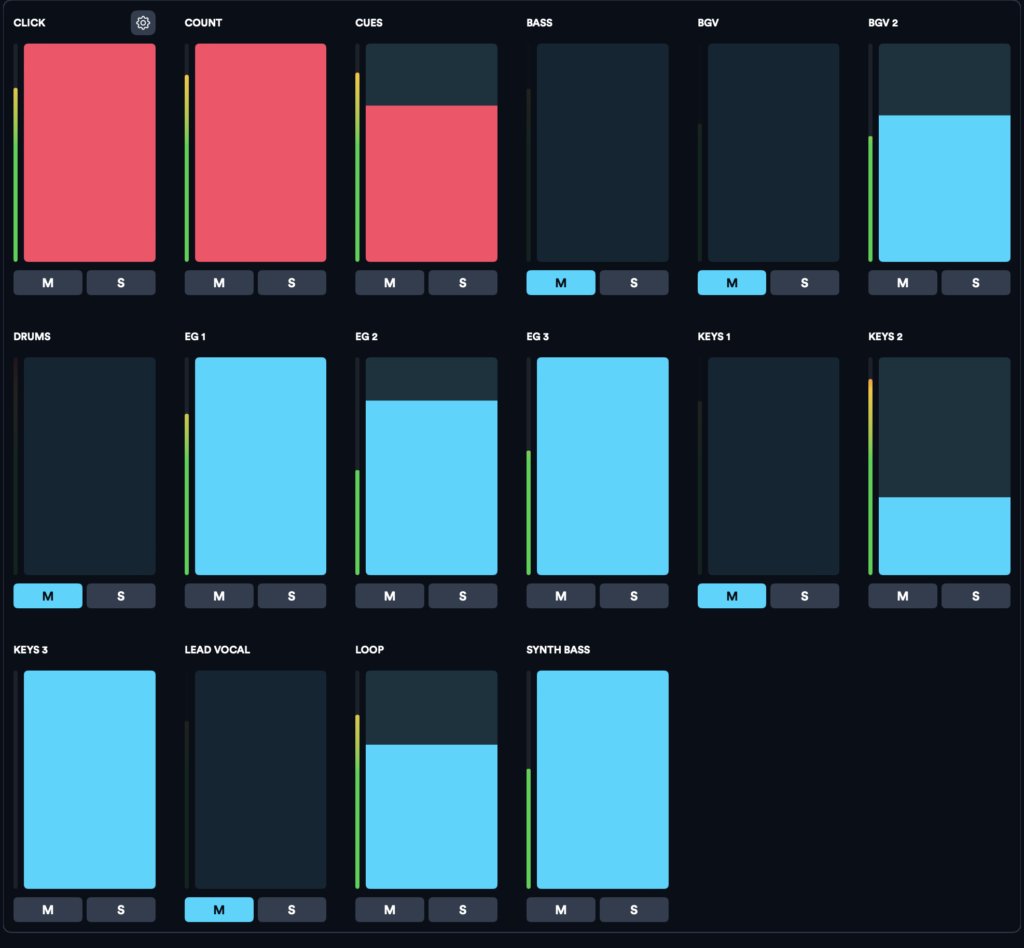
Click and cue tracks are read, all instruments and vocal tracks are blue.
Audio Channels
Here is a list of all of your audio tracks, they will be as you named them when you uploaded them. All of the volumes are adjustable and you can also mute or solo tracks.
Click Track
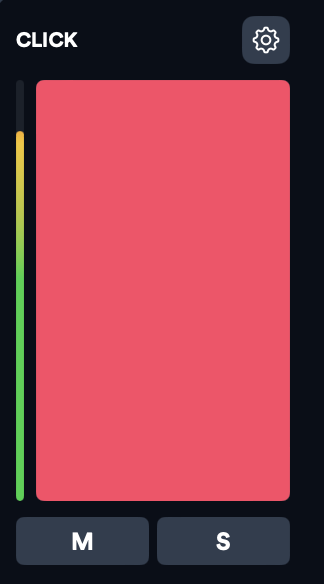
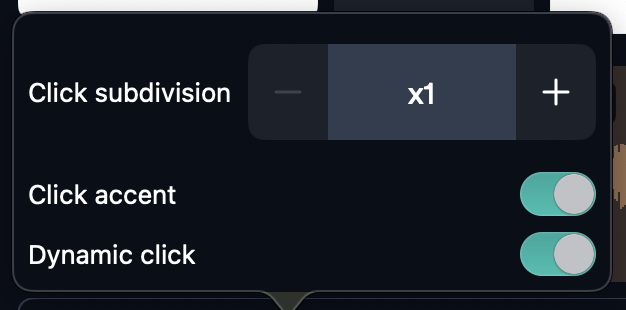
You’ll notice a little cog wheel top right of the click track. When clicked, it allows you to increase the click’s subdivisions, as well as add or remove an accent. There’s also the option for dynamic click.
Setlists
Setltists
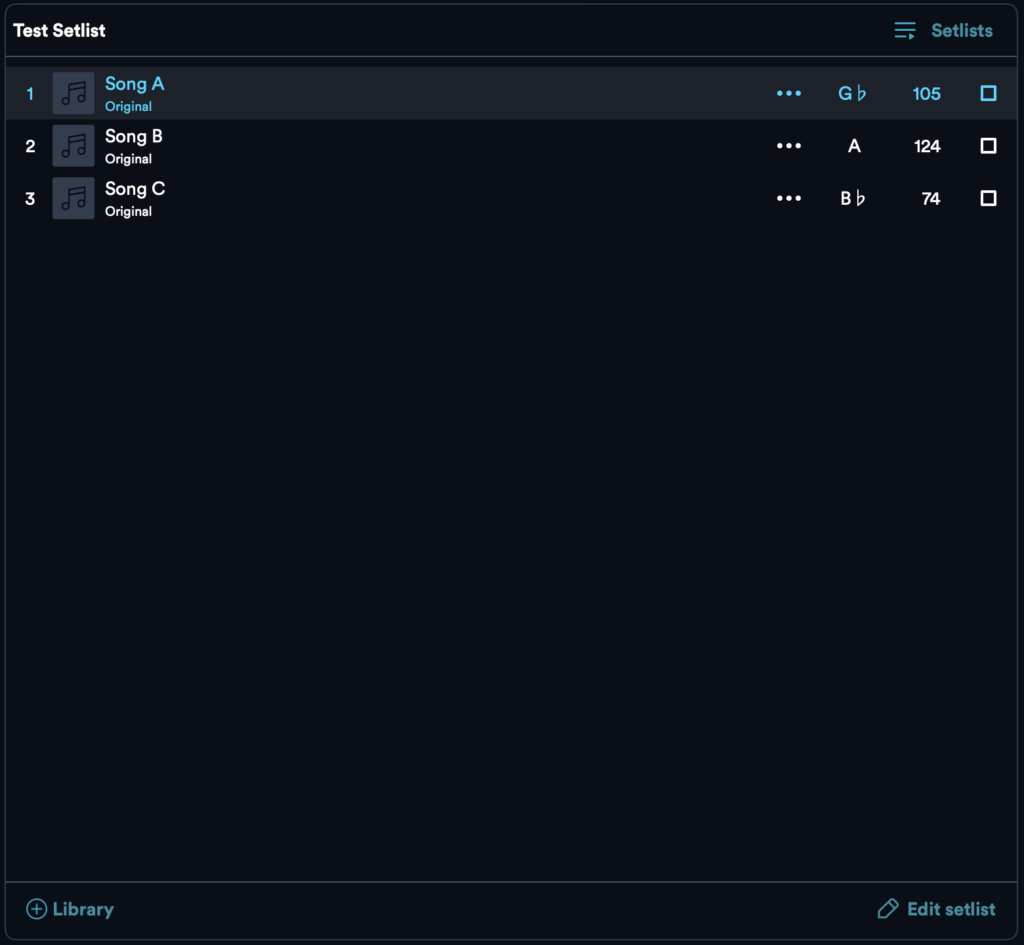
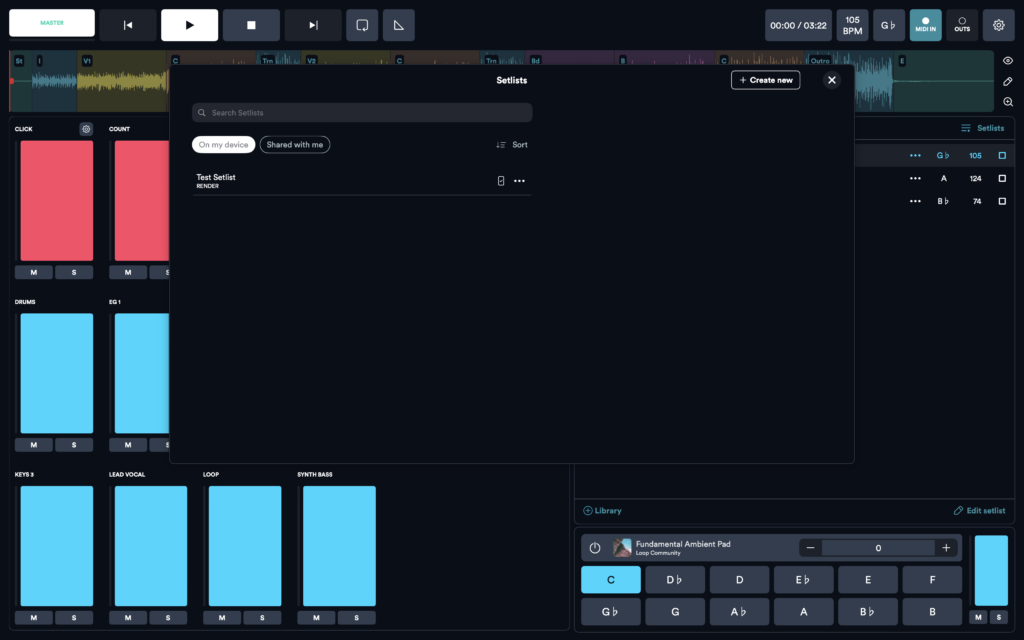
At the top of the setlists section, there’s the setlist name at the top left and a button that opens up all setlists at the top right.
Main Section
In the main section, you have the song name (and arrangement or version written underneath). Further to the right, there’s an ellipsis for each song, that gives you the option to remove the song from the setlist, then the key then the tempo. The final icon on the right is the song transition. By default, it’s a square which means it’ll stop after playback but there are 5 other options.
Crossfade – This fades out the current track while fading in the next track
Overlap – This starts the next track during the last section of the previous track
Auto Advance – This will start the next track as soon as the current track is finished
Advance – This will cue up the next track
Trigger – Stops the current track but keeps the click track playing until stopped

Library
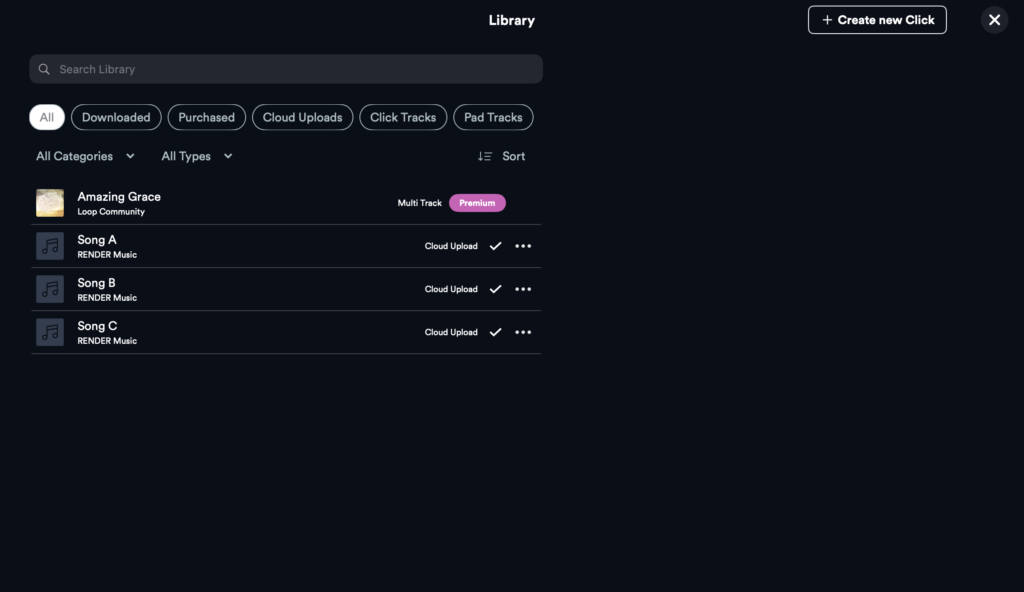
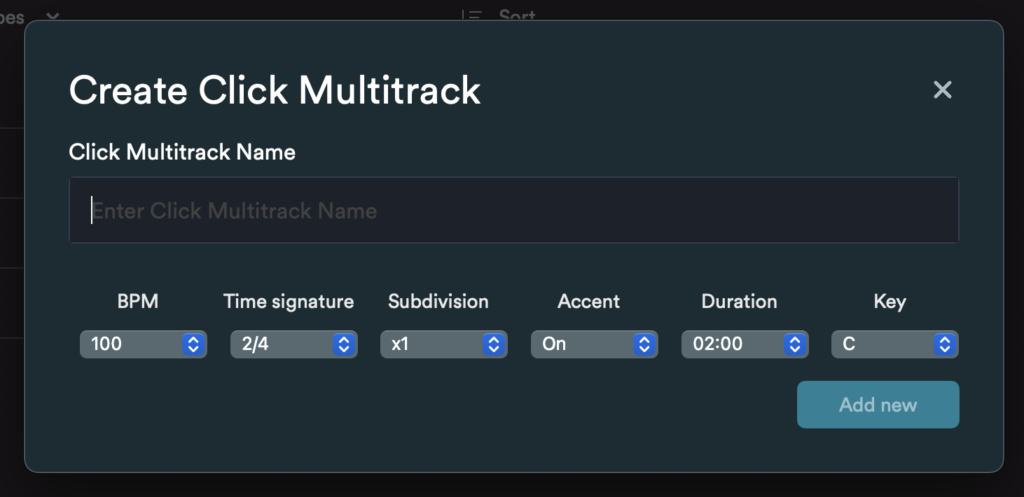
At the bottom left, you have the library, which has the list of your entire library of songs. Also, If you’ve not got stems for a track but need a click to keep time, you can create that here. In the library click ‘create new click track.’ Give it a name, tempo, time signature, duration and key then press ‘add new’. You can also change the subdivision and turn the accent on or off.
Edit Setlist
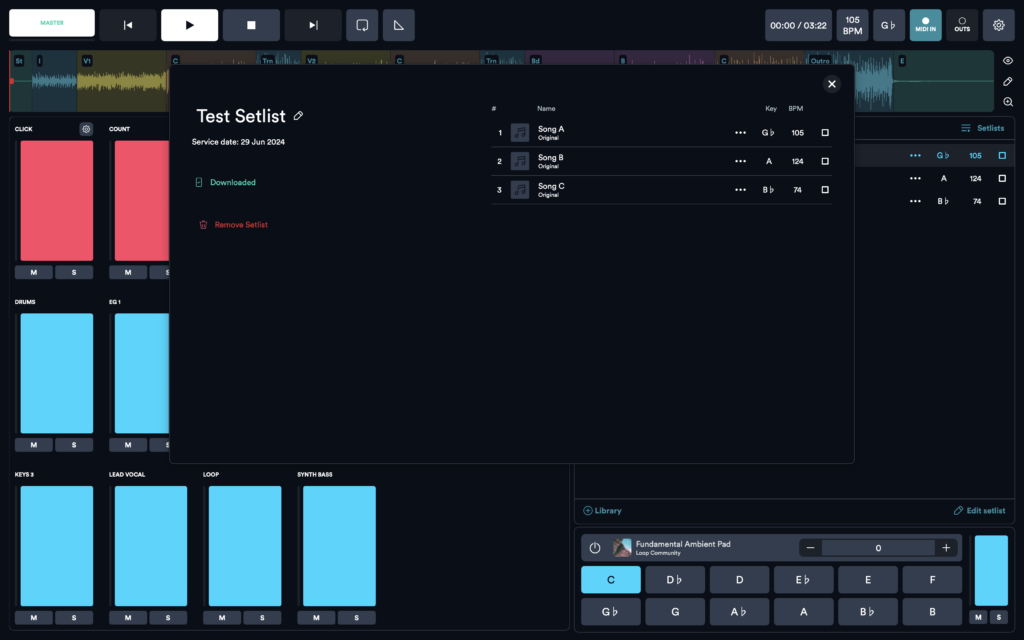
Lastly, at the bottom right the ‘Edit setlist’ button. It has the same functionality as the setlist window with the added option to delete your setlist.
Pad Player
Finally, at the bottom right, there’s a pad player. You can select what key you want the pad player to be in, set the octave with the plus or minus buttons, change the volume and mute or solo the pad player.

Closing Thoughts
There’s a lot that can be done with Loop Community’s Prime Multitrack app and we’re sure you’ll have fun experimenting with things. If you’re in a pinch and need a quick answer for something, feel free to refer back to this post. This is a free and easy way to run tracks but if you invest in a paid plan, there’s more functionality like the ability to share setlists with band members and the ability to rehearse to your own custom mix. We couldn’t cover all of that as this is just an intro to get you started, that being said though, we hope you found this helpful and informative.
Thanks for reading!
Leave a Reply